Saturday, June 25, 2011

Hack email accounts using google+pics

1 comments


Requirements:
Google Dorks
Code:
ext:sql intext:@hotmail.com intext:e10adc3949ba59abbe56e057f20f883e
Code:
ext:sql intext:"INSERT INTO" intext:@hotmail.com intext:password
Code:
ext:sql intext:@hotmail.com intext:password


Online hash cracker
http://www.h4ckforu.com/md5/


Ok lets begin:
Lets go to [URL="http://www.google.com/"]http://www.google.com/[/URL] and paste one of our dorks
[URL="http://img820.imageshack.us/img820/6850/97397719.jpg"][/URL][URL="http://img820.imageshack.us/img820/6850/97397719.jpg"]
http://img820.imageshack.us/img820/6850/97397719.jpg


Select one of displayed pages,as you see we now have a bunch of email accounts+ hashes
[URL="http://img842.imageshack.us/img842/2601/81283776.jpg"][/URL][URL="http://img842.imageshack.us/img842/2601/81283776.jpg"]


http://img842.imageshack.us/img842/2601/81283776.jpg


I selected a random account
"zhaokailun92@yahoo.com.cn"
d2491b289b6be1fd0bb0c8d60e053d3d
[URL="http://img823.imageshack.us/img823/8707/53326337.jpg"][/URL][URL="http://img823.imageshack.us/img823/8707/53326337.jpg"]


http://img823.imageshack.us/img823/8707/53326337.jpg


As you see we just hacked our fist account:
Email:zhaokailun92@yahoo.com.cn
Password:19920707
Its very easy,have fun and enjoy unlimited account

How To Create A HTTP Server At Home

0 comments


n this post we will see how to create an HTTP server. A web server is software installed on a computer that allows other computers to access specific files on that computer/server. There are many reasons to create your own home servers. For example: file sharing, so you can download files from your home computer from anywhere or you can create a web site on own server etc. Simply said It works like this; You choose a directory on your computer , in that directory add folders, files like music,video and etc. When you put the IP address of your computer the in web browser you can see all the files from that folder and you can download those files. Let’s now create a server(HTTP server!) using Apache(a server client):
1. You must have:
Broadband internet connection always on
Windows on your computer
2. Create a folder on your disc , in this example I created a folder on E:\my server
3. Download apache_2.2.10-win32-x86-no_ssl.msi and install it, set parameters( for localhost type something like a myserver.com(doesn’t really matter), also type your email address in field “Administrator@ Email Address” ) as shown below, choose where you want to install it.


4..When you install Apache , go to directory where you installed it (p.e. “C:\Program Files\Apache Software Foundation\Apache2.2\conf”) , here you will find a httpd file.
Open that file with notepad.


After this will appear notepad with long and complicated code, don´t worry, you must change just 3 things.
5. In notepad file find #DocumentRoot “C:/Program Files/Apache Group/Apache2/htdocs” and replace with #DocumentRoot “E:\my server”. Also find #<="" allowoverride="" and="" any="" apache2="" apache="" appear="" but="" can="" change="" create="" created="" disc="" e:.="" example="" files="" find="" folder="" group="" here.="" htdocs”="" i="" in="" is="" local="" none="" on="" other="" path="" place,="" program="" put="" replace="" server.="" server="" server”.="" span="" that="" then="" this="" to="" type="" where="" which="" will="" with="" you="" your="">

After this, save file like httpd.conf.

6. Type in web addresses http://localhost/ or your IP Address, you should see something like this


Every files you put in folder , which we created in step 2 , will be shown on http://localhost/
7. If you want access own server from other computers. You must forward a port in the router we’re using. The port we need to forward is port number 80. Why? Because by default it’s the port used for HTTP. Port forwarding actually means opening a tunnel through the router so that the router wouldn’t reject the connections that are trying to connect to it. How to port-forward? With every router it’s different. Here are the instructions for every one of them. You must also turn off you firewall.
That is all. Enjoy your home server. If you have questions, post them in the comments area.
Note: Creating home server is risky,when you open port, there is a possibility to have someone a breach in your computer .Before you start, make sure your computer has all the latest patches and security updates, and that you’ve done a thorough spyware and virus scan. This tutorial is only for advanced users  


link to download apachehttp://httpd.apache.org/download.cgi

Tuesday, June 14, 2011

Useful Symbols For MS Office

0 comments

These Symbols can be used in MS Word, Excel,etc.

For © : Alt+0169For ® :
 Alt+0174For ™ :
 Alt+0153For › :
 Alt+0155For  :
 Alt+0134For Ã¸ :
 Alt+0248For ¤ :
 Alt+0164 For « :
 Alt+0171For ° :
 Alt+0176For ± : 
Alt+0177For ² :
 Alt+0178For ³ : 
Alt+0179For Âµ :
 Alt+0181For ¶ : 
Alt+0182For ¹ :
 Alt+0185For » :
 Alt+0187For ¼ :
 Alt+0188For ½ : 
Alt+0189For ¾ :
 Alt+0190For Ã… : 
Alt+0197For × :
 Alt+0215For Ã˜ : 
Alt+0216For Ãž : 
Alt+0222For ÃŸ :
 Alt+0223For ☺:

Easy tip to increase internet speed

0 comments
This tip is designed for increased BROADBAND speed in Windows XP, but it should work for 56k modems too.

Note: This following tip will not work on XP Home Edition.

   1. Make sure you're logged on as actually "Administrator". Do not log on with any account that just has administrator privileges.
   2. Start > Run > type gpedit.msc (not available in home version).
   3. Expand the Local Computer Policy branch.
   4. Expand the Administrative Templates branch.
   5. Expand the Network branch.
   6. Highlight the "QoS Packet Scheduler" in left window.
   7. In right window double click the "limit reservable bandwidth" setting.
   8. On setting tab check the ENABLED item.
   9. Where it says "Bandwidth limit %" change it to read 0 (ZERO).
  10. Close gpedit.msc.

Effect is immediate on some systems, some need to re-boot

Google chrome shortcut keys

0 comments
CTRL + SHIFT + N : automatically opens up a Chrome ‘incognito’ window which allows you to surf on a PC without leaving behind any digital footprints.


SHIFT + Escape: allows for fast access to Chrome’s task Manager utility that allows you to nix browser processes that have gone awry.


CTRL + SHIFT + T: will open recently closed browser tabs.


Ctrl+N – Open a new window
Ctrl+Shift+N – Open a new window in incognito mode
Press Ctrl,and click a link – Open link in a new tab
Press Shift, and click a link – Open link in a new window
Alt+F4 - Close current window
Ctrl+T - Open a new tab
Ctrl+Shift+T – Reopen the last tab you’ve closed. Google Chrome remembers the last 10 tabs you’ve closed.
Drag link to tab – Open link in specified tab
Drag link to space between tabs – Open link in a new tab in the specified position on the tab strip
Ctrl+1 through Ctrl+8 – Switch to the tab at the specified position number. The number you press represents a position on the tab strip.
Ctrl+9 – Switch to the last tab
Ctrl+Tab or Ctrl+PgDown – Switch to the next tab
Ctrl+Shift+Tab or Ctrl+PgUp – Switch to the previous tab
Ctrl+W or Ctrl+F4 – Close current tab or pop-up
Alt+Home – Open your homepage
Ctrl+O, then select file – Open a file from your computer in Google Chrome


Ctrl+P – Print your current page
F5 – Reload current page
Esc – Stop page loading
Ctrl+F5 or Shift+F5 – Reload current page, ignoring cached content
Press Alt, and click a link – Download link
Ctrl+F – Open find-in-page box
Ctrl+G or F3 – Find next match for your input in the find-in-page box
Ctrl+Shift+G or Shift+F3 – Find previous match for your input in the find-in-page box
Ctrl+U – View source
Drag link to bookmarks bar – Bookmark the link
Ctrl+D – Bookmark your current webpage
Ctrl++ – Make text larger
Ctrl+- – Make text smaller
Ctrl+0 – Return to normal text size


Ctrl+B – Toggle bookmarks bar on and off
Ctrl+H – View the History page
Ctrl+J – View the Downloads page
Shift+Escape – View the Task manager

Useful Software keys

0 comments
adobe photo shop cs4 serial key

1235-1114-5477-3347-7571-7576-1330-1302-4838-3919-1811-3226


NODE 32 antivirus


username: eav-38140567
password:  v6apte3rdr


nero v9.4.26.0 serial key


1E30-9XK2-192A-X2X0-5746-A632-ECCK


coral draw graphics suit 11 key

DR11CRD-0012082-DGW

Thursday, June 9, 2011

Automatic refresh trick

0 comments

Friends here is a trick how to refresh your windows computer automatic. When you are watching some movie or any thing online then you press F5 to refresh your computer now set your computer to automatic refresh. Basically it is a registry trick. Most of software which increase your computer just refresh your computer. Now increase your computer speed without using any software and save your hard space also save your physical memory by decreasing your running application
Follow these steps
1. Goto run and type regedit and hit enter
2. In regedit goto to this
HKEY_LOCAL_MACHINE\System\CurrentControlSet \Control\UpdateMode
3. Here on right side edit the DWORD value to be between 1 and 5 and restart your computer
enjoy this trick

create hidden drive in pc

0 comments
here’s how to implement the hack: first off, back up your registry as this requires adding a key to the registry. Once you’ve backed up your registry, open the registry editor by clicking on StartRun and typing in regedit.


Now navigate to the following registry hive shown below:
HKEY_LOCAL_MACHINE\Software\Microsoft\Windows\CurrentVersion\
Policies\Explorer

Right-click on Explorer and choose New and then DWORD Value.


Name the new value NoDrives and then double click on it to open the properties dialog box. Click on Decimal for the Base unit


CHECK UR Computer's performance?

0 comments


Do u want to Monitor ur Computer's performance?

Go to:

>run
>Type: perfmon.msc
>Enter

CHANGE NAME OF RECYCLE BIN

0 comments


To change the name of the Recycle Bin desktop icon,
follow these steps
goto RUN type regedit
and then go to:

HKEY_CLASSES_ROOT/CLSID/{645FF040-5081-101B-9F08-00AA002F954E}

and change the name "Recycle Bin" to whatever you want (don't type any quotes).
plz leave ur comment

Saturday, June 4, 2011

Nokia Phone Secrets

0 comments


First things first, Nokia is a worldwide Corporation which owns 36% of the market share. So no doubt alot of you own a Nokia mobile, whether it be CDMA or GSM.

CDMA : Is a phone which does not need a sim card to run, it just stores everything on the phone.
GSM : Is a phone which has a SIM card (like Vodafone)

There are several codes that you can use on Nokia's, i will run through these in this article.
(Stand-by mode is the main/home screen which displays your battery charge and signal)

(NOTE: The Service Programming Menu only works on CDMA phones)
----------------------------------------------------------------------------------------------

1. Service Programming Menu - *3001#12345#

This menu is the mother of all Nokia codes, you can edit your phone like mad here, most of these menus your service provider probably doesn't want you to have the ability to do. So here we go.

On stand-by mode, type in *3001#12345# and wait a few seconds for it to load up. Once the screen comes up you will have several options, all with different functions. (NOTE: this menu differs on different phones.)

1. NAM 1
2. Change SPC
3. Security
4. Server addr.
5. SW version
6. Serial number
7. Programmed
8. Field test

----------------------------------------------------------------------------------------------

1. NAM 1 (* means explained below)

This is the most useful menu your phone has, it allows you to edit the heck out of your phone! inside NAM 1 there are these different menus:

Own number*
Mobile ID number
A-key code
Alpha tag*
Emergency*
Service No.
CDMA settings
NAM status

Own number:
Self explanitory, but if you want a new number then this is where you want to go. Just enter this menu followed by the SPC (see Change SPC) then change your number. This DOES work, but the new phone number you want must not already be in use.

Alpha tag:
You know on the standby screen, there's the "Vodafone" or "Telecom" or "T-Mobile" that appears? well now you can get rid of that annoying tag. Change this to whatever you please, just to make your phone more personalised.

Emergency:
This menu is basically a menu which displays all the numbers that will divert to the emergency number of your area. For example, if you live in USA and your emergency number is 911, in this menu there will be "911","811", "991" and the obvious numbers that you may type in while trying to reach 911. It's smart not to mess with these, because you never know when you'll be in an emergency. There should be some free slots so why not add in a couple more numbers that you want to divert to your emergency?
Some people think "Wow! emergency number! that calls for free, so maybe if i put in my friends number then it will give me free calls to him/her!" WRONG. This menu can NOT give you free calls. If you were to put in your friends number, then whenever you called them you would end up calling the emergency line - as that's what you're diverted to! REMEMBER THIS!

----------------------------------------------------------------------------------------------

2. Change SPC

The SPC is the Service Programming Code. This code is rather hard to come across, as the service providers try to hide it from the public so they can't access these places on their phones. But luckily enough if you live in New Zealand then here is the code :)

147359 - Is the default code that will let you into 'almost' anything
665*** - Is the 'master' code, that will let you into anything you like.

(The *** is the last 3 digits of your Nokia model, for example: If your Nokia was model number '8734', then your master code will be '665734'. The 665 is the default number for the Nokia company.)

So, this menu just means you can change the code. NOTE: Some mean stores when you buy the phone tend to access this menu and change it so that the owner can't access it :( that is not always the case though, so try it out!

----------------------------------------------------------------------------------------------

3. Security

This menu just shows you the security code that is installed on your phone, couldn't be more bland.
FUN TRICK: why not have a look at your friend/work mates' phone and access this menu, you could then see their security code or change it just for fun :) But we're nice people and that's naughty, so we arn't going to do that are we..

----------------------------------------------------------------------------------------------

4. Server addr.

This is the server address of your service provider. Nothing you can do here.

----------------------------------------------------------------------------------------------

5. SW version

Once again, another menu with not alot of meaning. All you can do in here is check out when your phone was activated, and what version software it is running. This can also be accessed on GSM phones (see below)

----------------------------------------------------------------------------------------------

6. Serial number

This is your serial number. DUH.
It would be a wise idea to jot this down somewhere safe, because this could be useful. If your phone was ever lost or stolen then you could contact your service provider and give them this code. This would let them shut the phone down so that your robber couldn't use your phone - or access anything on it for that matter.

----------------------------------------------------------------------------------------------

7. Programmed

This is just a menu that you can only access once, which lets you type in when your phone was programmed.

Seem like the menus are getting lamer? Wait for the next one..

----------------------------------------------------------------------------------------------

8. Field Test

This is an option which is quite cool really. Go into Field test and change "Disabled" to "Enabled". Then get out of the whole service programming menu.
Now, turn your phone off, and back on again.
Once it loads up go to your normal menu and scroll to the bottom. Notice you have just added a new menu to your phone? It is called Net Monitor.
Net Monitor speaks for itself, with this option you can monitor your network to a small extent.
Enter Net Monitor and it will prompt you with "Group/display:" enter in 3101 and press OK.
It should take you back to your standby screen, nothing will have changed. But wait a few seconds and then all these numbers will appear on your screen. What do they mean?

There is only one number you can really understand in this menu. This number is located as the third number down, it will say something like "-50" (the 50 can range anywhere from 10 to 99). This is how strong the signal is.

For example : If your phone displayed -10 here then it's telling you that your neighbour is a cell site and your signal is really really good.

If your phone displayed -90 then it's basically telling you that where you live or where you are at that certain time has really bad signal.

You will notice that as you get closer/further away to a cell site this number will grow or decrease.

----------------------------------------------------------------------------------------------

That sums up the Service Programming Menu, and the extra things your service provider doesn't want you doing :}

There are many other codes that you can use on CDMA phones, just search around for them.

Extra Codes:

*#66767# - This code when spelt out is "NO-SMS", so shouldn't that mean no texting? well, yes. If you enter this code in on your phone then you will no longer have the ability to "Create Message" or "Reply". If you're really mean then enter it on your brother or sisters phone, that's sure to give you some laughs. You can bring them back again by re-entering the code.

*#639# - This brings you to the menu which just re-programs your phone faster. I wouldn't reccomend you doing this if you value your phone.

*#7780# - This takes you to a menu which says "Restore Factory Settings", i think you understand what will happen if you press yes :p

GSM Code:

This is the only GSM code i know from the top of my head, just search around for more as I'm sure they're out there.

*#0000# - This is probably the most useless code you can find, but anyway it just gives you information on when your phone was activated. If your phone was sent in for repair, then this date will have changed to the date when it was fixed.

How to Unlock the iPhone 3G, 3GS Using BlackSn0w

0 comments


These are instructions on how to unlock the iPhone 3G and 3GS using BlackSn0w. To follow these instructions you must be on the 05.11.07 baseband and have already jailbroken.

If you have not already jailbroken it will be easier to follow one of these tutorials which will walk you through both jailbreaking and unlocking.
- Windows
- Mac
To check your baseband you can follow these instructions.

Lets begin...


Watch the Video!
For your convenience this tutorial is available in video format also. Click the Watch It button to view the tutorial!


Step One
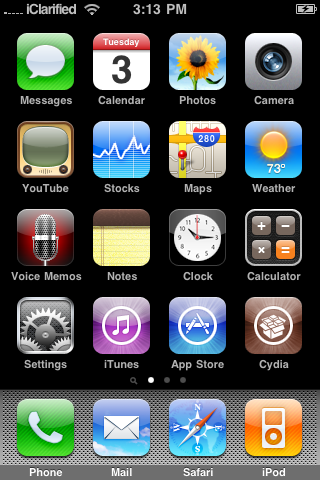
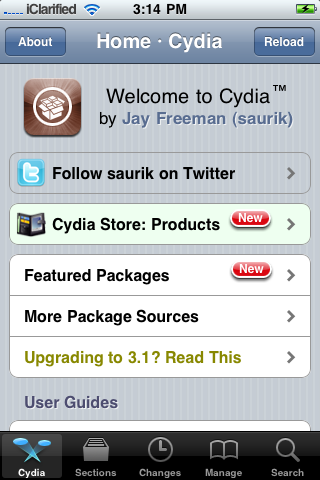
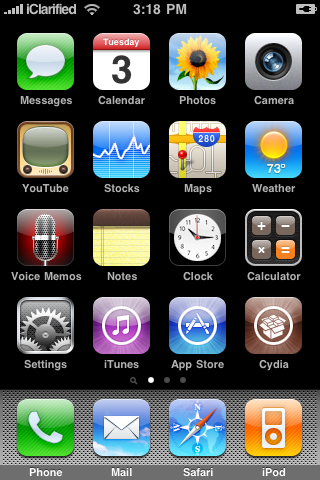
Press to launch Cydia from your iPhone Springboard.
Step Two
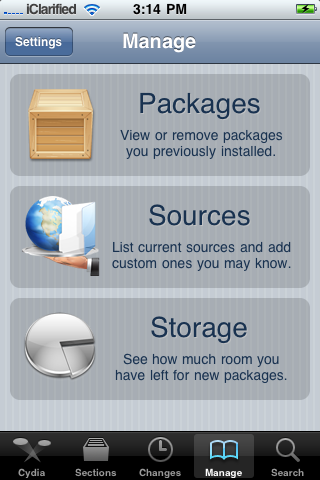
Press to select Manage from the tabs at the bottom of the screen.
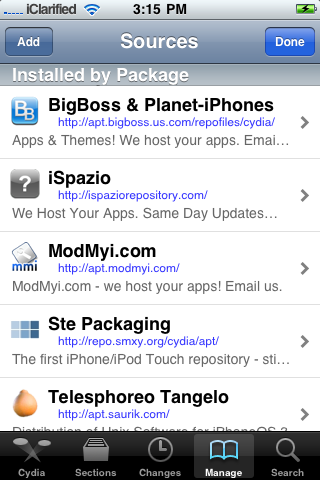
Step Three
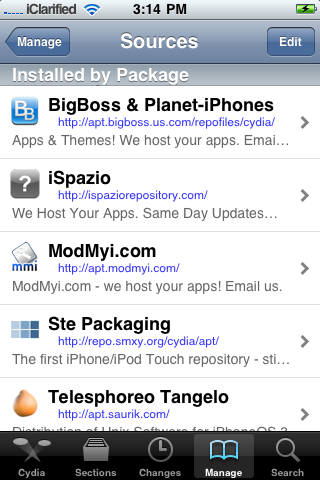
Press the large Sources button.
Step Four
Press the Edit button at the top right of the screen.
Step Five
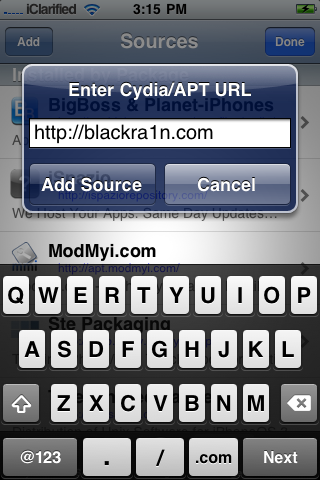
Press the Add button at the top left of the screen.
Step Six
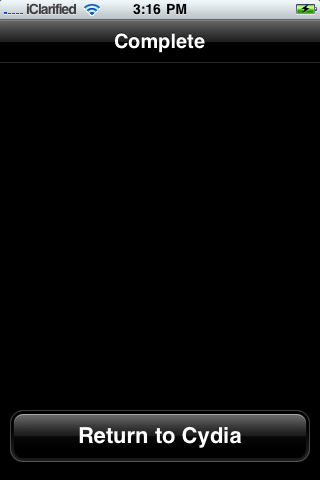
Input http://www.blackra1n.com as the source address then press the Add Sourcebutton. Once Cydia has added the source press the large Return to Cydia button.
Step Seven
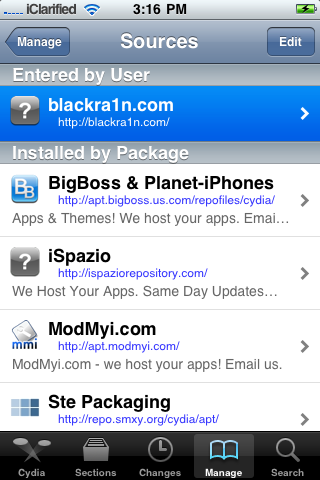
Press the Done button at the top right of the screen.
Step Eight
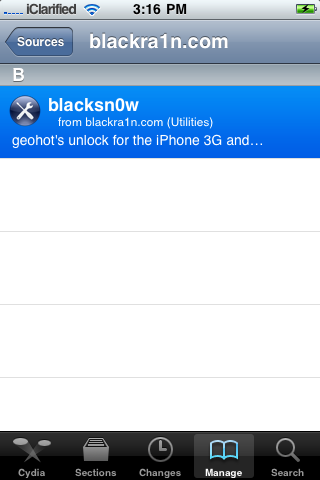
Press to select blackra1n.com from the list of sources.
Step Nine
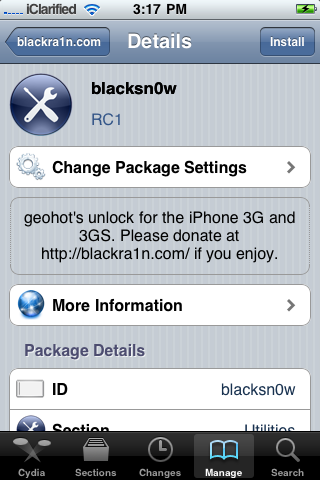
Press to select blacksn0w from the list of packages.
Step Ten
Press the Install button at the top right of the screen.
Step Eleven
Press the Confirm button at the top right to begin installation.
Step Twelve
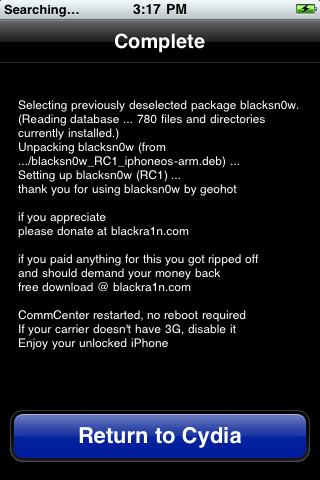
Once the unlock has been installed successfully press the large Return to Cydiabutton.
Step Thirteen
Wait a few minutes for your CommCenter to restart and you will now be able to use the SIM card of your choice on your unlocked iPhone!

How To Hack Facebook/Myspace/Orkut Or Any Email By Keylogging Fud Long Time

2 comments


Rapzo Logger v 1.5 ( Public Edition )By Rapid

[Image: 92564171.jpg]


" Virus Results By Scan4you.net 0/32 "(Paid Host )


[Image: 78831054.jpg]

Options


[Image: op2wo.jpg]

Stealers [6] All Stealers Pure Code - No Drops + Runtime FUD

[#] Firefox 3.5.0-3.6.X
[#] DynDns
[#] FileZilla
[#] Pidgin
[#] Imvu
[#] No-Ip

Features [25]

* Full UAC Bypass & Faster Execution
* Coded in Vb.NET
* Min Req Is .net 2.0 Now A days every pc Have it
* Cool & user friendly GUI
* Easily Understandble
* Encrypt Information
* Encrypt E-mail information
* 100% FUD from all AV's
* 4 Extentions [ . exe | .scr | .pif | .com ]
* Keylogger support - Smtp[Gmail,Hotmail,live,aol,]
* Test E-mail - is it vaild or not.
* Customize the "To" e-mail address.
* Screen Logger
* Cure.exe to remove server from your Compute
* Usb Spreade
* File pumper - Built-in
* Icon Changer - Preview
* Logs are nice and clear
* Log Letters - ABCD etc.
* Log Symbols - !@#$% etc.
* Log Numbers - 12345 etc.
* Log specific key's - [F4][F5][TAB][HOME][Pg Dn][Pause Break][Prtsc SysRq].. Etc.
* Hidden really good & invisible
* Send new logs over and over again
* ReadMe.txt - How To Use
* Vedio Tutorial - How To Use
Working on all Windows Operating System's - [Winxp\vista\W7] --- [32 + 64 ] Bit Computers 


Steler Logs : 

[Image: fine2.jpg]

[Image: fineh.jpg]

Who Wanna Change Assembly See This

[Image: asm.gif]

Download LinkS

http://www.mediafire.com/?belchwxdl6z2xl9

http://akenload.com/download/141/RapZo_L..._.rar.html

http://www.megaupload.com/?d=IFRRHPBX

http://rapidshare.com/files/418946168/Ra...tion__.rar

{Linux} Tips and Trick

0 comments


Are you a unix geek ? Here are both indispensible linux tips and tricks which are staleness for new and knowledgeable users alike.Lets change a aspect at them-More Linux Tips and tricks for geeks and newbies alike

Hurrying up your alcoholic journeying

Get faster file dealings by using 32-bit transfers on your cruel force

Conscionable add the line:

    hdparm -c3 /dev/hdX

to a bootup script.If you use SuSE or remaining distros based on SYS V,

    /sbin/init.d/boot.localised

should manipulate for you. This enables 32-bit dealings on your marmorean ride. On whatever systems it can alter soul action by 75%. To trial your show vantage, write:

    hdparm -t -T /dev/hdX

Author DOS-like commands
More grouping are unwinding to Linux because they avoid the stability of gracious old DOS. In that wanton, more users are typewriting DOS commands (which originated from UNIX in the premiere abode) that lie smooth but make errors. The order "cd.." in DOS is dead binding, but Linux balks. This is because "cd" is a mastery, and any constant for that dictation staleness be unconnected from the code book application in your domicile directory to modify the file ".bashrc". The point is there on utility, this hides the line from inborn ls representation.

Add the lines:

    name cd/="cd /"
    a.k.a. cd~="cd ~"
    alias cd..="cd .."

And I usually add these...

    name md="mkdir"
    name rd="rmdir -i"
    a.k.a. rm="rm -i"

and my position and comfort lover a.k.a....

    a.k.a. ls="ls --color"

name is a compelling puppet, and can be victimised in the .bashrc book as surface as from the compel connection. You can, if you need to pass the reading, create your own group of bomb commands to agree how you run. As longitudinal as you put them in your .bashrc record, they'll be there everytime you log in. Notation that if you oft log in as structure, you power require to simulate /home/username/.bashrc to /root/.bashrc to remain yourself lucid.

Scene your timezone
The timezone under Linux is set by a symbolic statement from /etc/localtime[1] to a enter in the /usr/share/zoneinfo[2] directory that corresponds with what timezone you are in. For model, since I'm in Southeast Australia, /etc/localtime is a symlink to /usr/share/zoneinfo/Australia/South. To set this join, type:

    ln -sf ../usr/share/zoneinfo/your/zone /etc/localtime

Pose your/zone with something suchlike Australia/NSW or Australia/Perth. Screw a lie in the directories under /usr/share/zoneinfo to see what timezones are purchasable.

   1. This assumes that /usr/share/zoneinfo is linked to /etc/localtime as it is low Red Hat Unix.
   2. On senior systems, you'll effort that /usr/lib/zoneinfo is utilised instead of /usr/share/zoneinfo. See also the ulterior writing ``The period in both applications is wicked''.

How to do approving with tar ?
You can mantain a position of files that you with to voice into a enter and tar it when you greet.

    tar czvf tarfile.tar.gz -T list_file

where list_file is a acerate name of what you poverty to allow into the tar

i.e:

    /etc/smb.conf
    /root/myfile
    /etc/ppp (all files into the /etc/ppp directory)
    /opt/gnome/html/gnome-dev-info.html

How to protect a computer from responsive to sound ?

a panduriform "sound 1 > /proc/sys/net/ipv4/icmp_echo_ignore_all" instrument do the fob... to grow it back on, only

    "ring 0 > /proc/sys/net/ipv4/icmp_echo_ignore_all"

Check adjusted for statesman tips and tricks.

Cheers

Friday, June 3, 2011

register sim

0 comments

send nic number to 544 for ufone.


send nic number to 8723 for zong.


send nic no. to 789 fot warid .

very secret trick

0 comments
after card load . save the card and use it after 2 years


Pakistani sim's 


Wednesday, June 1, 2011

ZonG bank cheque dlivery

0 comments
  if u want to check the delivery of any cheque book than type LEASE space CHECK ID and send it to 744

   for example
lease 2300.